Monday, June 29, 2009

Pilot's 'new' Jeep and Make-Do Trailer

My son loves his trucks and trailers. However no one builds trailers like he wants or needs, so he has to make his own trailers. So here is another one of his 'builds', it really tows nicely too.

< < < < ---- > > > >

Here is a make-do my son just did. He is 14 and still likes his remote controls. He bought this jeep (for $2.00 at the Thrift Store) and it was missing the battery holder door, so he made one out of stiff cardboard and duct tape.

We had a learning moment with finding the correct way to use the cardboard to make it strong and non-bendable. We looked at the way cardboard is made and I had him tell me what made the board strong. (the ribs) He then took two pieces of cardboard and bent them, and he found out that the cardboard ribs were very strong and difficult to bend in half (crosswise). But they would bend quite easily between the ribs (lengthwise).


Then he made a trailer hitch from a hook off a lanyard. And he made a trailer from Popsicle sticks, an old trailer ($.25 from the Thrift store) he took apart to get parts from , and lots of hot glue.

His unit runs awesome!

However, he has yet to put the boat on it to make sure the jeep can pull the weight. But it's OK because he is still learning and experiencing.


Way to go Pilot! Another successful Build!!


(Please do NOT notice the crumbs on my floor that we have now captured for eternity! The shoe is for scale purposes. yeah right......)


Jump back to Ann's Make-Do Mondays for more Ideas

Thanks for stopping by.
Please leave a comment if you have a moment.
We absolutely love feedback.

Sunday, June 28, 2009

Bananas!! Mini or Regular?


For the first time, we bought some mini bananas.  
And....... they were fabulous!  
Their skins were so thin and almost fragile.  
There were not any of those things like strings on them either.  
They were just the right size for me to have a couple of bites and not have to find someone else to finish my banana. 

 
Here are some big, and they were big, bananas next to the mini ones.  
They were good tasting too.  But I could not even eat half a one.  
But the small ones are a lot more expensive so we shan't be buying them again or often that is.  It was fun and we needed to have the experience of eating them! and comparing them to what we have always known bananas to be.  
It was a good lesson for all of us.

Saturday, June 27, 2009

Can You Find Pilot's Scar?

Pilot loves to show off his scar that he got when he had surgery back in January 2009 to fix 2 broken hand bones that he smashed and had to have them screwed back together from an accident he had with a rock while sledding during a fun moment while on a Scout overnighter.  (new breath!)  So to help him show where to find his scar, I wrote this message on his arm:


I think it helps point the direction to the scar in a helpful way.  His scar is fading and healing up really nice.  The telltale scar will always be there, but it is blending into his hand much quicker than he wanted.

He just got back from a 4 day Scout Super Activity on Thursday and I am happy to report that he came home without any injuries!  Yes!!  No one else was injured either!! Yes!!

They spent the majority of their time Kayaking on Lake Powell and he said he had no problem with his hand.  He seems to be able to do everything now and doesn't seem to be at all bothered by his injury.

Except, when mom squeezes his hand.  You see I was losing a battle with my balance mechanism the other afternoon and so I grabbed his hand for support.  I squeezed and he winced.  I realized that even though he stablized me, I had pinched a sensitive area in his hand.

Thank Heavens he lived through the squeeze and is still with us today.  He said, "oouuuie,"  when I grabbed his hand.  But I did say I was sorry and kissed it tenderly.  So I guess he got better quickly.  Got to Love That Kid~~!!!!  My special Pilot.......... I love him!!!

Helping a Friend with her New Kitchen

My Blogger friend at Kolfinnas Korner is having a bloggey game

"what's in my drawers?"


You can also see photos of her new Kitchen here on this page.


~~~~~~~~~~~~~~~~~~


And these are my suggestions to her.

*If I were in your kitchen, I would first see if I could (or Hubby could) switch the handles on the fridge/freezer so that the doors opened into the room and not the wall. That would be so much more convenient for you.

*Secondly, I would hang my pot holders on the wall near the stove, in fact I might even put up a towel bar so I could hang my towels there too. You can go here, to see how I have used Push Pins in organizing some things on a wall in my kitchen. I have a very shallow wall area that is behind my door to the garage. Nothing really fits there, so I acquisition the wall to hang things on.

*I would be thinking of putting in a bookshelf where you have your microwave cart and laundry drying rack. Then I could put the kitchen towels and linens rolled up in a cute 2nd hand basket. I would put my prettiest bowls and pots and pans on the shelves and some of my food. Cans, cereals, bottles. Maybe even my spices. I would fold up the laundry rack and hang it on hook(s) on the wall when I wasn't using it. And maybe I could hang a couple of things on it while it was on the wall and only take it down when I needed more room. And when I needed to use the whole rack, I would set it up in front of the Oven. If the oven had just been used, it would be warmer there too.

H * Silverware & knives

C * plastic bags/wrap etc.

F * trash bags

F * plastic storage container (or if you don't like the idea of them under the sink, put them in E)

J * FOOD!

B * Dish & hand towels, dish clothes & pot holders (if you use a towel rack, just put your extras here)

G * Teas, plates & bowls

I * Cutting board, mixer & salad shooter (I don't know how much room this will take but I want to assume that you could share the cupboard with the next line.....)

I * Mixing bowls & baking pans & pitchers (stock pot too, but it’s in the drainer right now)

A * Cooking utensils (wooden spoons, etc.) (I would put them in a tall crock on the counter, but since you don't have much counter, I might even put them on the wall- the one I use the most that is.)

F * extra laundry items, trash can

A * spices (if you have room in this drawer, put your small bottle of spices in here. Be sure to write what they are on the lids so that you can find them easier. If they won't fit here then I would put them into J or find a spice rack to hang on the wall.)

E *cooking things, (Not sure what these are, but I would put them here. The only real problem is that upper cupboards are not as deep as bottom cabinets and that can really put a damper on organizing things. Good Luck!)

D *glass & stainless cookware (If your drawer is not heavy duty enough for these, I would make a pot hanger. I just picked up some things at my local second hand store to make my own pot hanger. I hope it turns out.)

I rarely buy things new any more. I go to my second hand store when I have a hankering for something and I try to find things that I can use right off their shelves (after a cleaning of course!) or something I can innovate what I need and make-do with. It is fun and challenging to make-do and innovate.


*************************


Friday, June 26, 2009

My Food on Fridays for June 26th


Make-Do Strata


So for breakfast this last Father's Day morning, I planned on doing strata, per Pilot's request. I rarely make it the night before, because I rarely have room in my fridge to hold a pan overnight. So I asked Pilot to get a loaf of bread out of the freezer, so that it would be ready for the morning put together.

When I came down to the kitchen this morning, there was no loaf of bread thawed on my counter. Pilot had forgotten to get out the bread. So it was improvise time. I had some old- 2 weeks at least- square sandwich rolls in the fridge. It was panini bread or something of the sorts. It had been in the fridge and they were cold and dry. The bag they came in was not airtight and they really dried out. So into the Magic Bullet they went. Now I had bread crumbs instead of cubes for my strata.

I decided to use leftovers from the fridge this time and not my traditional recipe. So into a bowl I put about 6 eggs and whisked them up. Then I added about a 1/4 cup of Green Enchilada Sauce. Then about a 1/2 cup milk, to rinse out the green sauce bottle. The milk has a pull date of May 7, it was a manager special and 2%. Noone in my family likes 2% and so it has been sitting on the top shelf for over a month and I only use it for cooking. It still smells and looks fine.


Then to that I added about 2/3 cup cottage cheese that I found upside down with a pull date of May 1st. I really thought it was sourcream and I knew that sour cream would last a long time in the fridge unopened. I usually keep all my sour cream and cottage cheese containers upside down to help the seal stay sealed.

Then I added cheese, the remnants of 2 different bags, for a total of about 1 1/2 cups. Also a can of drained french cut green beans and a chopped up small pre-cooked chicken breast. I forgot to add any salt and pepper or other seasonings.


While I was putting the ingredients together, I turned on the oven to 350 degrees. I stuck a 2nd hand oval crockpot bowl in the oven to preheat. When the bowl was good and hot, I pulled it out and brushed it with bacon grease. Then I poured the 'strata' mix in. This was now not a strata. It was not a quiche, it was a breakfast casserole of some sort. It sizzled as it hit the hot greased crock. I finished it off with a can of cream of chicken soup that I basically iced on the top of the mixture. It would become icing gravy, if all went well.


I stuck it back into the oven, set the timer for 40 minutes and headed up to shower. When I came back down, I checked the casserole and decided to turn up the heat to 375 and added 30 more minutes. I really don't know how long it baked, but finally it was done. Hot and set in the middle, a little brown crust starting to form on the sides and bottom. It smelled good.

It sat for a few minutes, and then it was time to scoop it out and try it. This is the results:

---With a possible 5 stars---

Me............................................. 5
Hubby............................................5
Pilot...................................................4
Angel...................2 after the first bite

And then Angel said to send it to the starving people of the world!
So I guess her new rating would be a -5! Bless her for her honesty and generosity!!
However, there just wasn't enough left to send to the starving people of the world.


It must not have been too bad or the pan wouldn't be looking like this!


So my Make-do portion was making do with the ingredients I had on hand. Making Do with my new $1.50 old (looks brand new) crock pot crock as a casserole dish. Cheap and it really cooks nicely. I love using cast iron, stoneware and crocks to bake in. Everything turns out awesome!!!


~~~~~~~~~~~~~~~~~~~~~~~~~~~~~

Return to Ann's Blog for the Food on Fridays carnival and find more posts that might be
anything remotely related to food.

~~~~~~~~~~~~~~~~~~~~~~~~~~~~~


Check out my other posts for these meme's:

Tuesday, June 23, 2009

How I Cook Bacon (mostly for the Grease )


Making and Saving Bacon Grease


I usually buy a bulk bacon package of the ends and pieces that don't get sliced up right. Then I snip away at it with my trusty kitchen shears to get bits and small pieces, if I need some crumbled bacon for a recipe.

When I am in the mood to cook bacon or when my bacon pot gets hungry, I toss all the bacon in the crockpot. I turn it on high and let it cook away.

I do not remember how long I let this cook, but I usually end up over cooking the ends and pieces. I really think I let it cook on high for a good 4 hours or more. I really doubt that it should take that long. But I kind of forgot to check it, because every time I checked it I had to taste it, and I was getting sick from the 'too much grease' in my tummy.

I haven't lost any or at least very little from my not keeping an eye on the frying process, thank heavens. I really must be more diligent in the kitchen! The grease still comes out perfect too.

I was just thinking that if the bacon cooks in the oven, there would probably be grease spatters all over. In the crockpot, the spatters get caught by the lid. So this is my preferred method of cooking bacon for the grease. I am not sure how slices would come out, but it is worth the experimentation to find out.

Next time I cook my ends and pieces, I will stir it at least once to break up my bacon. Last time I did not do this and I had a huge lump of bacon- it looked like an fried pork roast. I don't remember having this problem before, so it is either I watch my bacon better or selective forgetfulness. The bacon still tasted great though. I will be watching it more closely so that I can remove the bacon when the grease is cooked out.

After the bacon is removed from the pot, I set the pot on a cooling rack and let it sit overnight or until the grease turns white and thick. Then I use a rubber scrapper to move the grease into my pot(s). I keep a bacon grease pot in my travel trailer too. I usually let the grease cool down in the pot, because I usually spill when I try to pour the liquid grease from my crock pot. Plus you can get the crock pot really clean with a rubber scrapper when the grease is cooled down. That way there is less that might get into your drain pipes. So your drain pipes and your oven stay clean!!


I also don't mind getting the small well cooked bits that gather on the bottom of the crock in my grease pot. If I am making a gravy, that adds great flavor. Although, I think next time I will ladle out the clear grease into my bacon grease keeper and then let the bottom leftover firm up. Then I will move this stuff to a bottle in my fridge and use it for white sauce and gravies.


Above Left: Bacon grease pot w/Silicone Brush
Above Right: Butter pot with Silicone Brush


I keep the grease in a little pot near my stove with a silicone brush for greasing my pans when I cook. It might be better in a cupboard, less dust would want to settle there. But I now have a cute(?) 70's pot with a lid. However, I do keep my silicone brush in there most of the time and so the lid does not fit tight. But it is working for me.

A sugar pot would work the best, I think they have a hole cut in for the spoon. Or maybe a jam or jelly pot. But I have not run across one of them at the thrift store yet. I am keeping my eye open for one. I figure when I find one, then the current pot I am using will return to the Thrift Store to be loved by someone else.


I really don't know how good/healthy bacon grease is for us to use. However, I do know that it costs a lot less (free by product) than buying oils, pam or using butter- my next preferred method. I also cook mostly with cast iron, stoneware and crock pots (both in the crockpot base and in the oven) and bacon grease has never let me down.

......Waste not, want not, I'll let the bacon grease go to my waist........(besides it tastes great!)


Above: Left-Bacon grease with lid and brush, Top-butter dish with brush,
Mini Tea pot soon to be bacon grease holder
and bottom is my extra bacon grease pot with lid for the trailer.
~~~~~~~~~~~~~~~~


This is my new (thrift store find) soon to be bacon pot! I think it is so cute. I could still change my mind and put butter in here and then I could nuke (microwave) the butter if I needed melted butter and pour it out. I have been musing this over. It is a fight though, will the winner be bacon grease or butter? You may never know...............
~~~~~~~~~~~~~~~~~~
This is my $1.50 crock, no scratches, chips, stains or marks- thrift store find. I got the lid for $.25 and even though they weren't made for each other, they are getting along very well. It is either a 2 or 3 quart pot, I haven't measured it yet.
~~~~~~~~~~~~~

How about this lovely $2.00 thrift find? It also bakes wonderfully and released
smoothly with bacon grease! It also works as a relish tray with carrot
and celery sticks, baby pickles, olives, dips, etc.
~~~~~~~~~~~~~~~~~~~~~
I should have taken photos of these two crockery bread pans together. The one on the left is a quick bread size, just smaller than a regular bread loaf. The one on the right is a mini loaf. In fact I am not sure if it truly is a bread pan, but that is what I am using it for.
The larger pan was not a Thrift Store find, but it was only $4.00- not too bad for a good non-stick bread pan. Again, non-stick using bacon grease. The mini pan was a $.75 Thrift store find and I have 3 or 4 others, they are also Christmas but of the Snowman theme.
I am quite sure that my bread won't mind if it is being baked in a Christmas decorated pan. And I am quite happy to get a hint of Christmas all year round!
~~~~~~~~~~~~~~

My final photo is of my new favorite round bread crockery pan. It was $4.00 too or maybe it was the $3.75 one, I can't remember. But the banana bread I baked in it was awesome and I loved the round shape. It is about a quart and a half in size. Small but perfect, again non-stick for me with my bacon grease.
I loved using it and will enjoy it for years to come. Barring any dropping or quick temperature changes! I plan on really teaching my kids well on how to care for these wonderful pans/crocks.

~~~~~~~~~~~~~~~~~~~~~~
http://images.crateandbarrel.com/is/image/Crate/PorcelainCanistersS9?$category$
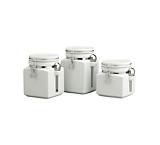
OHHHHH!! I might have a small canister crock with the hinged lid and spoon holder on its side. (The photo is of a square set, but mine is round.) If I do, that might be my answer to keeping the lid on the grease and the brush with the pot. But now that I type, I think the spoon holder wouldn't be big enough. But maybe it is, I will have to go find it and see. (it's in my use for Christmas presents box) The next thing would be a plastic cover for the brush end- that shouldn't be too tough. A small ziplock or such sleeve- made easily the correct size with a bag sealer............

~~~~~~~~~~~~~~~~~~~
Shared on Works for Me Wednesday.
Please drop over to We Are THAT Family for more WFMW tips and ideas.
~~~~~~~~~~~~~~~~~~~~~~~~~~~~~

Check out my other posts for these meme's:

Sunday, June 21, 2009

My Make-Do Monday for June 21st


There are two parts to this Make-Do.

First: Use for an old (or new) bicycle tube.

Cut your tub into half inch wide pieces and you create some super strong long lasting rubber bands. A mountain bike tire produces longer rubber bands, a regular bike tire makes smaller bands. You have do choose what you need.

Here we have used a regular tube and made small bands for Pilot to secure his fishing pole parts together with.


**********************
Pilot is headed out to Scout Camp/Super Activity tomorrow at 4am. They are going to Lake Powell in Southern Utah. I love Lake Powell and am a bit jealous that I am girl not boy, jealous again. They are going to use Kayaks! Then fish. Then hike to Anasazi ruins. Play in the water. I am truly jealous! But on the other hand, I am so very pleased that we have some very fine leaders in our Scouting program that want to be with our boys and take care of them while they have fun. I feel blessed, very blessed that we have such fine leaders and other young men that my 14 year old can associate with.

So on with the Make-Do portion.

It is the fishing part of the trip that had us concerned. Taking a regular pole takes some awkward space. The pole and the tube it is stored in. And the fishing at Powell can be great, even super at times. Other times one may never get a bite. Pilot had to weigh the pros and cons of taking a regular pole with him. So as we were going through the fishing kit, to get hooks and leader line, etc, Pilot looked at our Bottle Bobbers we made last year. He decided he would take two of them and his pole. Then next thing I hear is, "I'm not going to take my pole. I'm just going to use the Bottles."

"Really? Why," I asked. He responded with, "well they take up less space, are lighter, and will still get the job done." He got it- He was going to have to carry his gear and the lighter Pilot could make it, the better.

However it has changed again. He just got home from dropping his gear off and some of the other kids are taking their full sized poles, so he said he is taking his. Oh well, the logic was there for a moment. However, if he carries his pole and doesn't catch fish, maybe next time he will go the lighter way with the bottle line.

So anyway, back to what the Bobber Bottle is.

We took a small water bottle or soda pop bottle.

Then we tied 30# line to the neck of the bottle. On one side of the line we had about 3 to 4 feet of line and at the end of that line we tied on a swivel- the one that has a safety pin like end. This is the end we fasten to our chair or shoreline twig- the end that is secured on dry ground.


To the other end of the line, that was about 5 to 6 feet long, we added another swivel to which a fishing line with a swivel and a hook can be attached. On the one in the photo, there is not a second swivel. We tied the hook directly to the end of the second line on the bottle. This one is a bit short, but we needed it short.

I wound up the long line without the hook. And then wrapped the hooked line around the bottle and stuck the hook end into the label. Then I put a cutting from a sock over the bottle, acting like a big elastic band holding everything safe and secure on the bottle. If your hook has a swivel at one end, you would undo the swivel and then put the hook and line into the bottle. This way the hook definitely will not come undone and catch you when you least expect to be caught!

In Pilot's bottle, I put his line with swivel and hook. Extra hooks, a worm threader with a couple of feet of string, a small fingernail clipper with a couple of feet of string and some extra line. The couple of feet of string is so that he can tie the tools on the kayak or his own belt loop so he doesn't accidentally drop them into the lake. The clippers are so he doesn't use his teeth to cut the fishing line.


In the future, I want to replace the bottles we have made with the larger mouth bottles, like the mountain dew bottle I use for my water bottle. It would make getting the extra gear out of them a lot easier.


~~~~~~~~~~~~~~~~~~~~~~~~~~

Thanks for visiting with me today and leave me a comment if you have the time.
Now jump back to Ann's site for more ideas.
~~~~~~~~~~~~~~~~~~~~~~~~~~~~~
Check out my other posts for these meme's: